Want your finished project to look fabulous? Learn to block your crochet. A transformation happens.
I reviewed and updated this post on July 11, 2022.
Table Of Contents
- What Is Blocking In Crochet?
- Do I have To Block Crochet?
- Things To Be Aware Of
- Materials & Equipment
- Tips For Different Fibers
What Is Blocking In Crochet?
In crochet and textile crafts, blocking is wetting/soaking or steaming your finished garments.
This sets their shape by being stretched on a surface to dry. Crocheted a shawl and had the “sting ray” effect? Blocking evens the edges.
Blocking evens the stitches and increases the level of drape.
Use it on many projects
- Sweaters
- Shawls
- Ponchos
- Afghans
- Blankets
- Lacework
- Hats
- Scarves
- Gloves
- Socks
Blocking is only for natural fibers.
‘Killing’ adds more drape to a crocheted acrylic fabric.
Blocking is used before sewing crocheted pieces together. When you’ve sewn everything, steam block the seams for a lovely finish.
Some crocheters prefer to block after they’ve finished their garment, if it’s crocheted in one piece like a seamless sweater.

All The Wonderful Reasons to Block
- Straightens stitches
- Evens the tension in your crocheting
- Defines intricate patterns and opens up the design
- Relaxes the stitches
- Soaking washes excess dye from the yarn
- Creates a smooth look
- If you have pets, a good soak removes unwanted hair
Find perfect gifts for crocheter with my article.
Do I Have To Block Crochet?
You don’t. No finishing needed? Skip it. Don’t block lurex (a metallic yarn) or novelty yarns.
Amigurumi doesn’t need blocking, nor does a pillow cover or lap blanket. Garments need blocking. A minimum for finished crochet projects is a quick wash and flat dry.

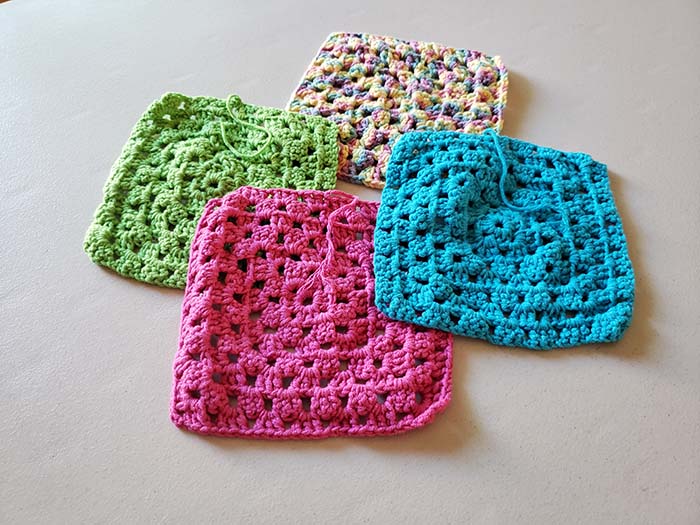
Crochet Projects Needing Blocking
- Shawls
- Scarves
- Squares for blankets
- Finished blankets
- Lace stitches
- Open work items
- Fillet crochet
- Doilies
- Garments
Check out the softest yarn for baby blanket in my guide.
Things To Be Aware Of When Blocking Crochet Projects
Most yarns spring back when you pull them. Over-blocking makes the yarn lose its bounce. This flattens out textured stitches like cables.
Material & Equipment
Necessary
- Sink or clean bucket
- Rust proof T-Pins or good quality sewing pins
- Towels
Don’t use your best white fluffy towels (the risk the dye may seep from the yarn). Use older clean towels instead.
Nice To Have
- Wool Wash or Baby Shampoo
- Blocking Mats
- Blocking Boards
- Stainless Steel Blocking Wires (great for shawls and larger projects)
Blocking Mats / Blocking Boards
A blocking mat is great. Some have grid markings for measuring. Blocking mats are easy to pin foamy material.
Most are tiles that fit together to make a board.
We Crochet has blocking mats in a carry case of nine. The foam mats are 1/2″ thick and measure 12×12″.
One side is textured, the other is smooth with a printed 1″ grid.
No Blocking Mat?
Here are tips:
- A table or a kitchen bench laid with towels is great for garments
- Trying to block a lace project? Pin it on a cork bulletin board, or flattened cardboard boxes
- Put your project out of the way
- Don’t use a surface that marks with moisture
Ever crocheted a sock before? With my review of great socks yarn, now’s the time!
Stainless Steel Blocking Wires
These wires straighten out edges of shawls. There are also flexible blocking wires for crochet, great for curves on shawls.
An alternative for straight edges is the String Method.
A long length of smooth scrap yarn threaded through a darning needle and the yarn is threaded along the edges.
Here are recommendations for blocking wires.
Lace Blocking Wires by We Crochet
It has
- 15 (34.5″/8.8cm) stainless steel, rust-proof straight wires
- 20 nickel-plated T-pins
- Blocking instructions
Before using blocking wires, wipe them with a soft cloth to remove manufacturing residue.

Knit Blocking Wires
No products found. No products found.This kit made in the USA contains
- Twelve 36 inch rigid wires
- Two 24 inch flex wires
- Twenty steel T pins
- Wire blocking instructions
- Sturdy storage tube
- Measuring tape
T-Pins
Trying to block a garment? The best pins for blocking are T-pins.
Rust-free sewing pins work too.
We Crochet T Pins are nickel-plated steel. They’re rust resistant and 1.5″ long. Perfect for garments and shawls.
Knitter’s Pride Knit Blockers Set
No products found. No products found.- 12 blockers with 8 pins
- 8 blockers with 4 pins
The blocking squares are dense, sturdy plastic. The pins are rust resistant and stainless steel.
Knit Picks Blocking Starter Tool Kit

Includes:
- 12″ Blocking Mats
- T-pins
- Blocking Pins
- Soak Wash – Travel Pack Assorted
- Instruction Labels
- Knit Picks Lint Shaver
Wool Wash
Wool Wash keeps items clean, and smelling great!
Soak Wash doesn’t need rinsing out.
Don’t have wool wash? Use mild baby shampoo or delicate dish soap. Rinse with clean water once or twice.
Pinning Basics
On a flat surface, a blocking mat is ideal.
Pin the crocheted item around the edges, placing the pins at an angle, with the top of the pin pointing away from the garment.
Place the first in the top center, moving to the bottom center as you pin the piece to the correct length.
Pin your work to the correct width (if blocking a sweater, start with the bust width). Fill in the edges according to finished measurements.
Blocking Tips For Different Fibers
- Natural fibers like wool & alpaca benefit from full wash blocking.
- Cotton is difficult to block. Wet blocking is best
- Starch on fine work stiffens crochet thread
- For fibers like wool blends, mohair, angora, cashmere, and acrylic and synthetics, spritz/spray block
- (This is like washing, but you spritz the fabric until it’s wet, with a spray bottle. Don’t soak it.)
- Steam blocking is an alternative method using heat and moisture.
- Never use a heat method on silk as it’s too delicate

How To Block Crochet: Blocking Methods
How Do I Block Acrylic Yarn?
Spray block acrylic yarn.
Want to change the drape of your acrylic garment? Use “killing.”
‘Killing’ is when you steam block acrylic yarn.
Grab your acrylic work, and lay it on the ironing board.
Using the steam setting on your iron, go over your crocheted project but don’t touch it. It’ll melt the yarn or flatten it.
Once you’ve ‘killed’ a garment, you can’t restore its original shape.
Wet Blocking
This method is washing the crocheted item by immersing it in water and letting it soak to relax the fibers.
(AKA Immersion Blocking.)
Benefits Of Wet Blocking Crochet
- Blocking relaxes the fiber and stitches
- The settling process evens flaws and defines the stitch pattern.
- Giving yarn a wash rinses away residue
- Soaking your crochet helps the fiber release the extra dye
- Improves the drape of a garment
- In most patterns, the way it fits happens after you block. Gauge swatches need blocking too
Step 1
- Fill a sink or bucket with lukewarm water
- Squirt Wool Wash or baby shampoo into a sink/bucket but not too much as you’ll have lots of rinsing
- (Some detergents like Soak you don’t have to rinse at all)
- Give it a mix
- Place your wet crocheted item in the bucket
- Leave it while it soaks for 10-30 mins, don’t dunk it
Step 2
- While soaking, grab an older towel
- Lay it on a surface.
- Using a blocking mat? Interlock as many needed
Step 3
- Return to the sink
- Drain the water.
- Squeeze your crochet (don’t wring!) to get out the water. Be gentle.
- Press your item against the edges to remove the rest.
- Place in a soft dry towel
- Roll up the towel to get extra moisture out
- Standing on the rolled-up towel removes extra water
Step 4
- Lay your crocheted items on the blocking mat/towel
- Stretch to the desired length and width
- Grab t-pins (or rust proof sewing pins)
- Pin every few inches around the perimeter
- Patterns have measurements for length and width when blocked
- Read those.
- Let your crochet dry for up to 1-2 days
Step 5
- Wait until everything is dry before unpinning it
- You’ll be delighted at the transformation 🙂
Misting or Spray Blocking
Misting or spray blocking is excellent if you’re a beginner.
Step 1
- Lay your newly finished work onto a soft towel
- Put the towel on a flat surface
Step 2
- Grab a clean mist bottle
- Fill with water
- Mist your work
Step 3
- When damp but not soaked, pull your crocheted item into the desired measurements
Step 4
- Use pins to keep the work in place
Steam Blocking
This blocking technique is a gentle method without soaking your crochet. You need a steam iron.
(Aka ‘dry blocking.’)
Step 1
- Place your crocheted piece on the blocking mat
- Pin it using T-Pins
Step 2
- Use the hottest setting for steam on your iron
- Go over your item WITHOUT pressing down
Step 3
- Let the work cool
- Flatten the wonky stitches
Step 4
- Let the pieces dry
- You’re ready to sew
I’d love to hear how your blocking goes.
It’s worth the effort for the finished look.
Pin Now to Save for Later
